|
  |
| View previous topic :: View next topic
:: View posts since last visit |
| Author |
Message |
stevef
Administrator

Joined: 27 Aug 2003
Posts: 1643
Location: USA PA ALLENTOWN
|
 Posted: Sat Jan 03, 2004 4:55 pm Post subject: TUTORIAL: Rose Tree - A new kite by Steve Posted: Sat Jan 03, 2004 4:55 pm Post subject: TUTORIAL: Rose Tree - A new kite by Steve |
 |
|
I am making a new kite!
Created for the "Visions of Lewis & Clark Kite Exhibit" to be displayed at the Billings Logan International Airport from February 2004 - December 2006. Thirty North American Kitebuilders agreed to participate in this project by selecting a Lewis & Clark journal quote or subject that they are interpreting into thirty, vastly different kites. Over 4 million people will be exposed to this exhibit while visiting the airport.
My contribution is a kite I call "Rose Tree"
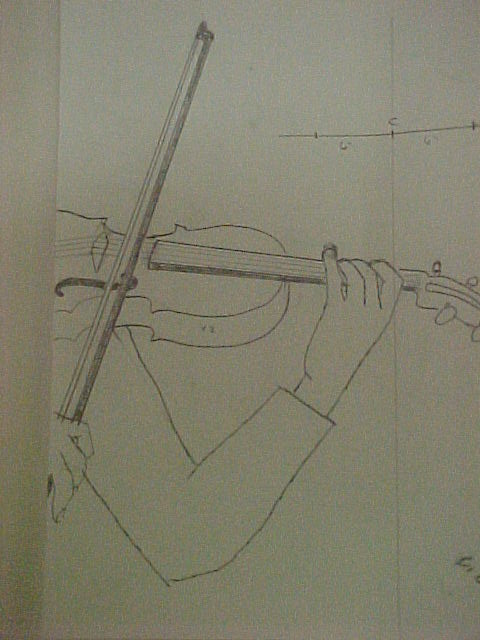
It is my interpretation of the theme: "Fiddling and Dancing"
More information regarding the theme (and kite) will follow.
---
Other kitebuilders from this forum are also participating and you can see some of their kites here
"Visions of Lewis and Clark Kite Exhibit" tours at the airport will be available, with advanced reservation required. It is anticipated that there will be at least 150 tours with an average of 25 people per group.
During July 23, 24, 25, 2006 featured kitebuilders will come to Billings for a Signature Week Kite Festival. They will fly all the exhibit kites at Amend park and other locations along the Yellowstone River.
At the close of this exhibit on December 30, 2006 the kites will be placed in various indoor locations throughout the world. Montana's sister state, Kumamoto, Japan and the Kumamoto Kite Association would like to host the exhibit in Japan after it leaves Billings.
I am honored to be part of this wonderful and historic display.
-Steve
_________________
Steve Ferrel
Kite Studio
Measure once, buy twice! 
Last edited by stevef on Thu Dec 01, 2005 11:14 pm; edited 14 times in total |
|
| Back to top |
|
stevef
Administrator
Joined: 27 Aug 2003
Posts: 1643
Location: USA PA ALLENTOWN
|
| Posted: Sat Jan 03, 2004 4:59 pm Post subject: Conception |
|
|
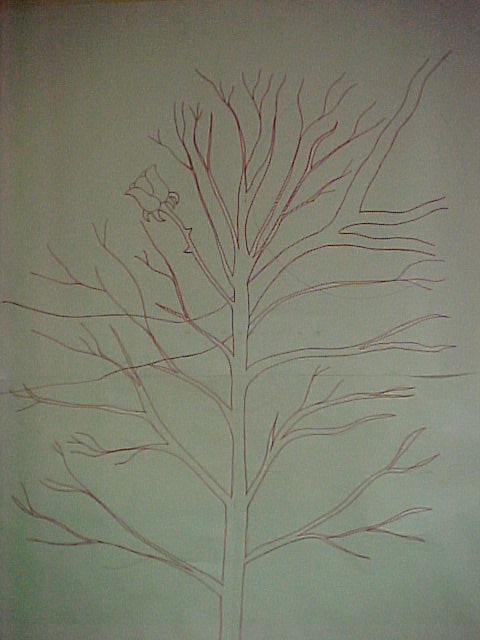
Here are a few sketches that I drew on paper then "blew up" with an opaque projector. All of these (and more) will go into the kite.
Pattern 1:
Pattern 2:

Pattern 3:
Pattern 4:
_________________
Steve Ferrel
Kite Studio
Measure once, buy twice!
Last edited by stevef on Sat Jan 03, 2004 6:13 pm; edited 2 times in total |
|
| Back to top |
|
stevef
Administrator
Joined: 27 Aug 2003
Posts: 1643
Location: USA PA ALLENTOWN
|
| Posted: Sat Jan 03, 2004 5:07 pm Post subject: Creation... |
|
|
I am not going to describe every single step, but I will show a few details of each layer.
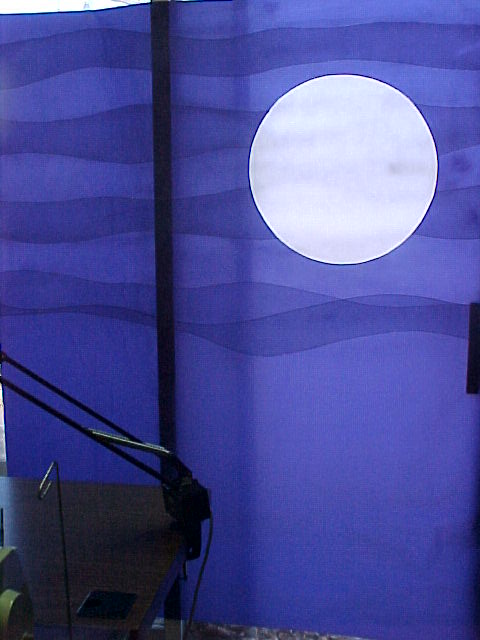
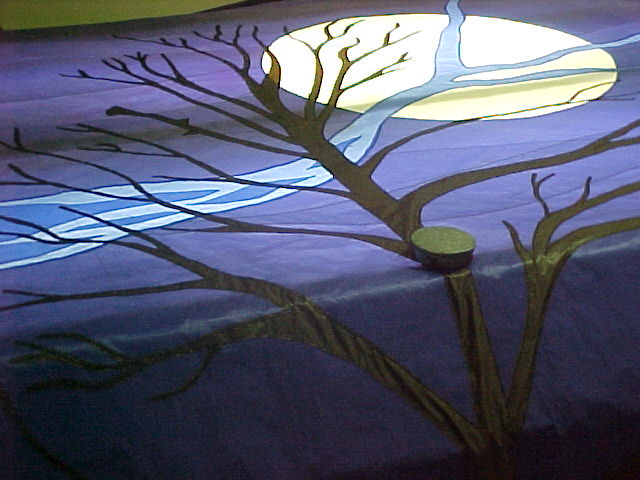
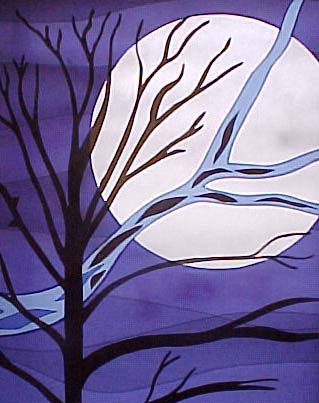
The first step was to create a background. I wanted the image to appear in a moonlit sky so I began with North Cloth's Grape. It is a very dark purple.... but to add depth and interest I added white to the back side. After the background was sewn and relief cut, I added the moon as a seperate piece. You can see some of the details on the BACKSIDE here:
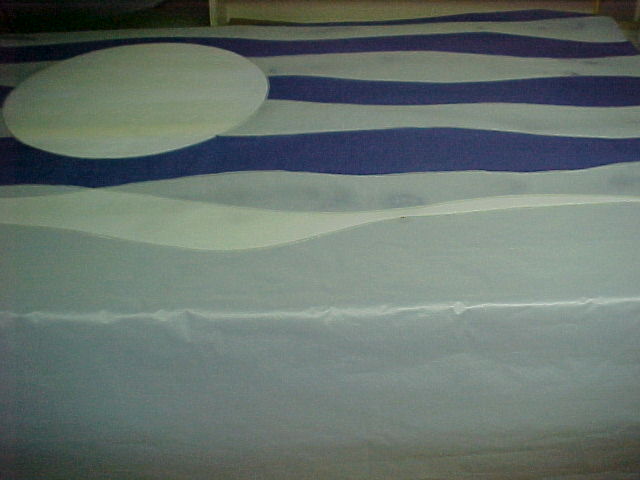
As an extra feature, I also used Design Master Paints and sprayed Fuchsia, Lilac, and Purple highlights onto the front of the background piece. The paints become visible when the kite is not backlit. This is on purpose because I want the kite to look differently with and without the light... just as the expedition was different during the day and night...
"By day, Private Pierre Cruzattes official duty on the Lewis and Clark expedition was lead boatman. He navigated the rivers, avoided the obstacles, and ensured the safe journey on the waters for men of The Corps of Northwest Discovery. By night however, Cruzatte was an extremely well playing fiddler
"
Here is the FRONTSIDE:
(the vertical shadow is not part of the kite, it's my sliding door!)
_________________
Steve Ferrel
Kite Studio
Measure once, buy twice!
Last edited by stevef on Thu Jan 15, 2004 12:53 pm; edited 16 times in total |
|
| Back to top |
|
Dorsal
Kite Builder II


Joined: 05 Oct 2003
Posts: 470
Location: USA California Tracy - 50 miles to the right of San Francisco
|
| Posted: Sat Jan 03, 2004 5:15 pm Post subject: |
|
|
Wow! I really love watching an actual artist at work!
Steve, what gave you the visual inspiration? I mean, I'd love to create some real art like this, and have LOTS of different colors of materials already, but I lack the inspirational vision of what it should look like.
How do you dream these things up?
_________________
"The wind is the perfect reminder of God.
The only way we can prove it exists is by observing the things it affects.
That's why I believe in the wind, too."
Dennis
Baha'i Faith |
|
| Back to top |
|
stevef
Administrator
Joined: 27 Aug 2003
Posts: 1643
Location: USA PA ALLENTOWN
|
| Posted: Sat Jan 03, 2004 5:16 pm Post subject: |
|
|
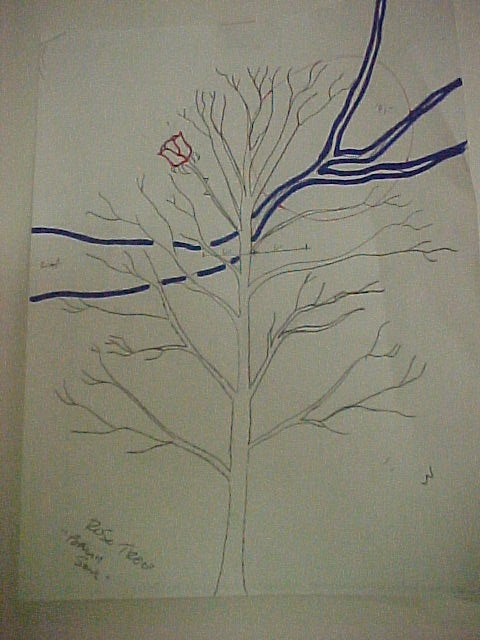
The next step is to add the river. I did this by lightly spraying the pattern with Low Tack. Then I layed in a single layer of North's Periwinkle. You can see it here:
Then I relized the pattern was upside down, so i reversed it , resprayed, and then hot cut the river:

Then I lightly spray glued the whole pattern/river, turned it over and layed it onto the background piece. Then I slowly removed the paper pattern:
_________________
Steve Ferrel
Kite Studio
Measure once, buy twice!
Last edited by stevef on Sat Jan 03, 2004 6:48 pm; edited 2 times in total |
|
| Back to top |
|
stevef
Administrator
Joined: 27 Aug 2003
Posts: 1643
Location: USA PA ALLENTOWN
|
| Posted: Sat Jan 03, 2004 5:28 pm Post subject: |
|
|
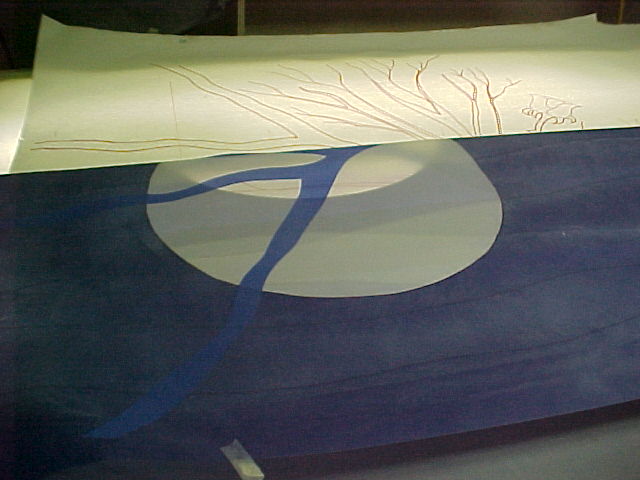
Ok, I sewed the perimeter of the river and relief cut the back. Then I wanted to add some depth and interest to the river. So I added some extra Periwinkle pieces to the BACKSIDE. Each piece was hotcut free hand then spray glued and sewn into place. You can see it here:
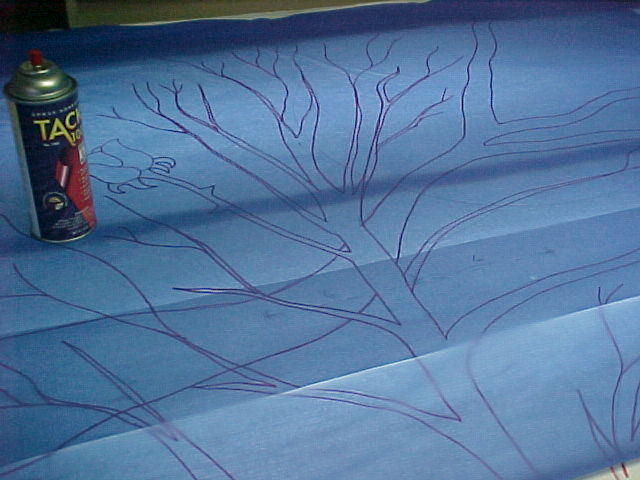
The next step is adding the tree..... I drew the tree in pencil on the backside of the background piece. I wanted the tree to be nice and dark, so I layed down two big pieces of brown to the top of the background piece. A light coat of spray tack in between. I also hot cut/welded around the whole perimeter of the background piece/brown to ensure that the brown would not slide around while sewing.
Then I sewed, and sewed, and sewed around the tree... then I sewed some more.
Then I relief cut, relief cut, and relief cut around the tree...... Then I relief cut some more!
Here is the (almost) finished tree on my light table:
Now.... back to the river.
_________________
Steve Ferrel
Kite Studio
Measure once, buy twice!
Last edited by stevef on Sat Jan 03, 2004 7:58 pm; edited 16 times in total |
|
| Back to top |
|
stevef
Administrator
Joined: 27 Aug 2003
Posts: 1643
Location: USA PA ALLENTOWN
|
| Posted: Sat Jan 03, 2004 5:30 pm Post subject: |
|
|
| Dorsal wrote: | Steve, what gave you the visual inspiration? I mean, I'd love to create some real art like this, and have LOTS of different colors of materials already, but I lack the inspirational vision of what it should look like.
How do you dream these things up? |
In my sleep of course! ....and in the shower, and in the car, and over a good cigar!
_________________
Steve Ferrel
Kite Studio
Measure once, buy twice!
Last edited by stevef on Sat Jan 03, 2004 6:08 pm; edited 1 time in total |
|
| Back to top |
|
Mountain Man
Kitebuilder of the Year 2003


Joined: 04 Sep 2003
Posts: 1022
Location: NB Canada
|
| Posted: Sat Jan 03, 2004 5:32 pm Post subject: |
|
|
Wow ! that will be quite a kite! Looking foward to more pics as you go along ! 
What are the dimention of the kite?  now where do you get such nice material to work with ? just kidding I think I know ! now where do you get such nice material to work with ? just kidding I think I know !
_________________
Bernie
the Mountain Man
Paint the sky...
"Fly a Kite!"  |
|
| Back to top |
|
stevef
Administrator
Joined: 27 Aug 2003
Posts: 1643
Location: USA PA ALLENTOWN
|
| Posted: Sat Jan 03, 2004 7:00 pm Post subject: |
|
|
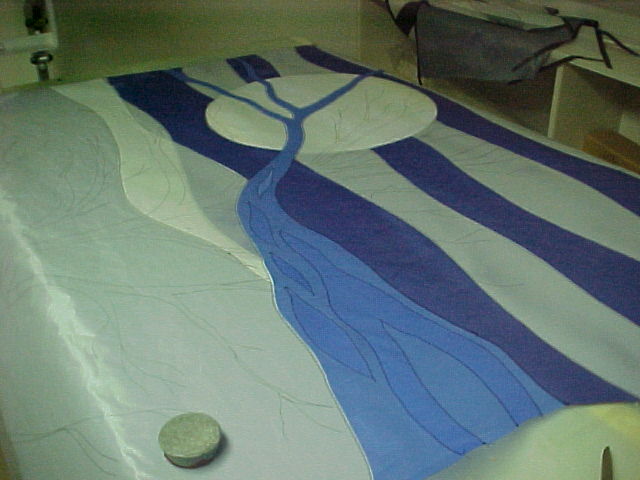
I wanted to make the river look like it is part of the tree's branches. The kite is symbolic in many ways, and the tree "ties" everything together. Instead of adding blue highlights to the river like I did on the left side, I added BROWN highlights to the right side... Does it sort of look like part of the tree?
Next step............. the rose.
_________________
Steve Ferrel
Kite Studio
Measure once, buy twice! |
|
| Back to top |
|
imagin
Kite Builder I


Joined: 22 Oct 2003
Posts: 280
Location: Moncton, NB Canada
|
| Posted: Sat Jan 03, 2004 9:09 pm Post subject: |
|
|
Yeh, very interesting how you did that, changing to brown highlights in the river. Actually, doing that seems to create more flow of the images...almost a dreamlike effect. I'm enjoying watching your process.
_________________
Knowledge is limited. Imagination encircles the world. |
|
| Back to top |
|
|
View posts since last visit
|
You cannot post new topics in this forum
You cannot reply to topics in this forum
You cannot edit your posts in this forum
You cannot delete your posts in this forum
You cannot vote in polls in this forum
|
|
 |
 |
Kitebuilder.com Forum © 2005
Powered by phpBB 2.0.15 © 2001, 2002 phpBB Group
|
 |
|
|
